Once upon a time...
Glen Lewis
True, the bow part of the equation may have come later but the general principal was the same. Once you grasp the concept and find suitable dry materials, fire by friction is not all that difficult. I wouldn’t want to rely on it for my only method of making fire but it is a valuable technique to know. Not only will it teach you better all around skills for other fire making means but the simple magic of making fire this way is something to be experienced as it is quite the rush.
After flying around northern Arizona most of the day I was not left with much time but I wanted to do something outside so I cut the materials from my front yard and practiced some fire making skills. I was able to get a few images as awkward as that was while trying to assemble and hold together all the parts.
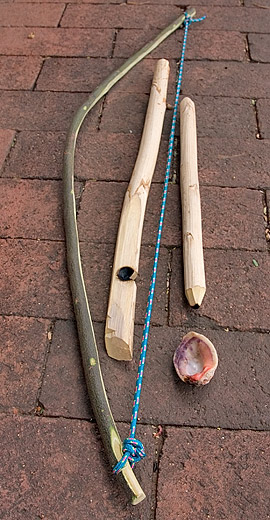
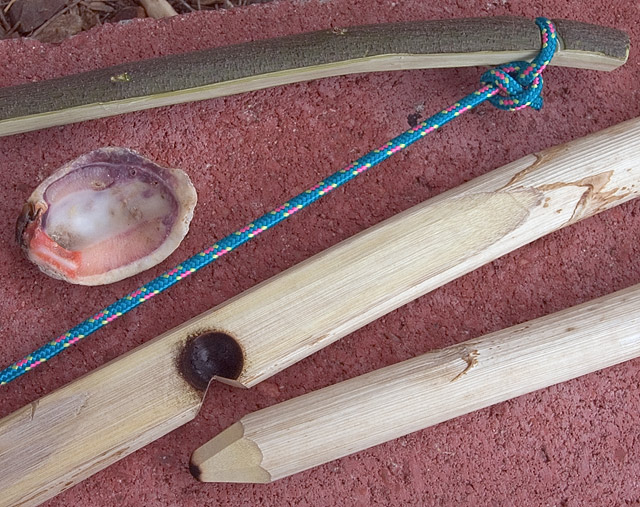
All you really need is a knife and some good cordage. I like thicker cordage as it seems to grip better. Next you make yourself a bow. You can use many sizes and I have seen guys who have contests to see who can make the smallest all around bowdrill kit. I like to make them about three feet long. That gives you lots of power. I have chosen natural materials that occur in the deserts where I live for this project and the bow is acacia. You need a spindle and this one is about 12” long and is made from a Yucca stalk. Simply sharpen both ends. One end will drill into the fire board and the other will rotate on a bearing. I made the base board out of the same Yucca. With this you carve out a conical depression from about ¾ of an inch to one inch back from the edge. This will vary with the diameter of your spindle so you have to slightly experiment. Now you prime it by some drilling. To drill you need a bearing so the top of the spindle will spin freely in place. This is the hardest part to make. Some use a nicely shaped rock they have found, some make one out of very hard wood and lubricate the bearing end of the spindle and others simply make it some other way and keep it in their kit. I used a seashell I found on a Mexican beach for this project and it is so smooth that it let the spindle spin super freely. Now once you burn in your original depression and seat the spindle you need to carve a V notch so it goes part way into the burned circle. This will let the ember materials find a way out and down on to your little nest of grass fibers.
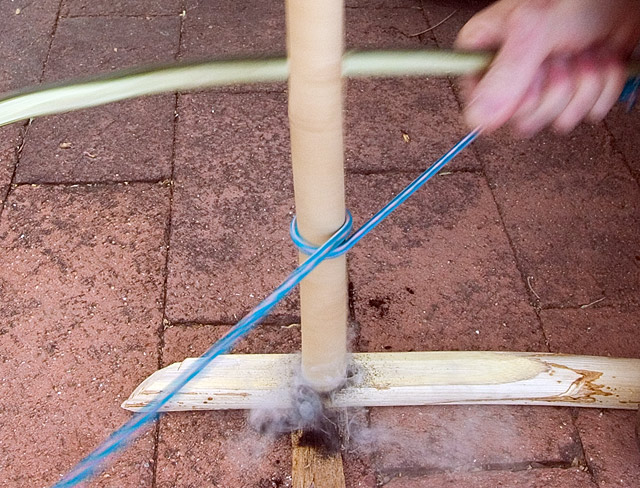
To assemble your drilling machine if you are right-handed, first put the spindle into the bow. Then step on the base board with your left foot, hold the bow in your right hand and place the bearing over the spindle top with your left hand. The left hand is then braced together with the left leg. You will want a tinder bundle of grasses or a platform of leaves under that notch to catch the ember you are going to make. Now you start a sawing motion back and forth. There is a lot going on here at first so a little practice will make this a smooth motion.
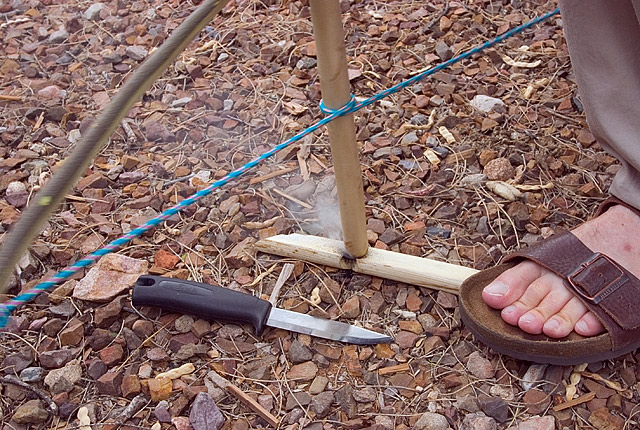
I did not put a tinder bundle under this one as I was just getting an illustration of how the whole mechanics work. It was a windy day as well which was blowing away most of the smoke which can become very thick. I was able to spin up a nice ember in 30 seconds. This is fresh cut Yucca. It has dried on the plant for some time though.
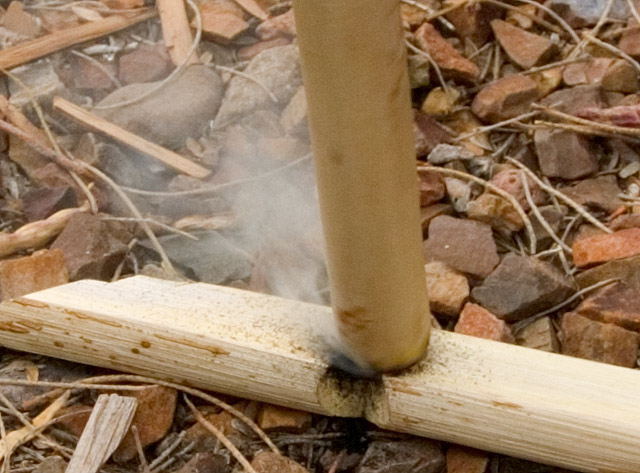
As you see, the friction will heat up the wood surfaces, the surfaces will rub against each other and start shaving off little particles and heat them at the same time. This substance will build and then at one point if you are sawing enough and the material is dry, it will reach the critical point of combustion. You will see a glowing ember form. This ember is very delicate so be careful not to break it up. Carefully lift it up with the tinder bundle that it rests on and place it in a bigger “nest” of tinder and hold it up about eye height or a bit higher and gently blow. This will keep most of the smoke out of your eyes and give it lots of air. Soon the flames will burst forth and you will have fire.
Here is a better photo with wood shaving for the coal catcher.
This is a view of the coal you get.
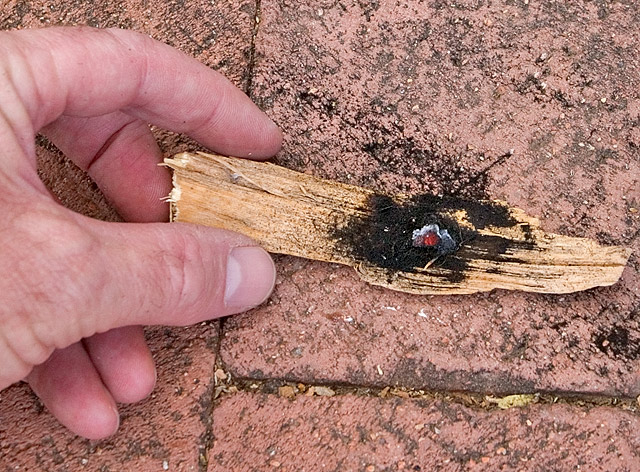
At first they don't look like much, just some black stuff that is slightly smoking. They all tended to fuse to the V notch so I had to carefully loosen them and let them down easy to the wood shaving. These coals were surprisingly long lived at about a minute's worth of life. They burned down into the wood shaving and would easily light up a dry tinder bundle.
©2004 Glen Lewis